Easily ROOT your Walton Primo E2 and Install CWM Recovery Easily
 |
| Walton Primo E2 |
This
article describes "How to Root Walton Primo E2 Using Framaroot" and
"How to Install custom CWM (ClockWorkMod) recovery on Primo E2 using
Mobileuncle Tools". Following is article is safe. Means it won't brick
your Primo E2 down. But remember that your device warranty will be gone.
And of course even if it does (damage) then that's your responsibility,
not mine.
Root Walton Primo E2
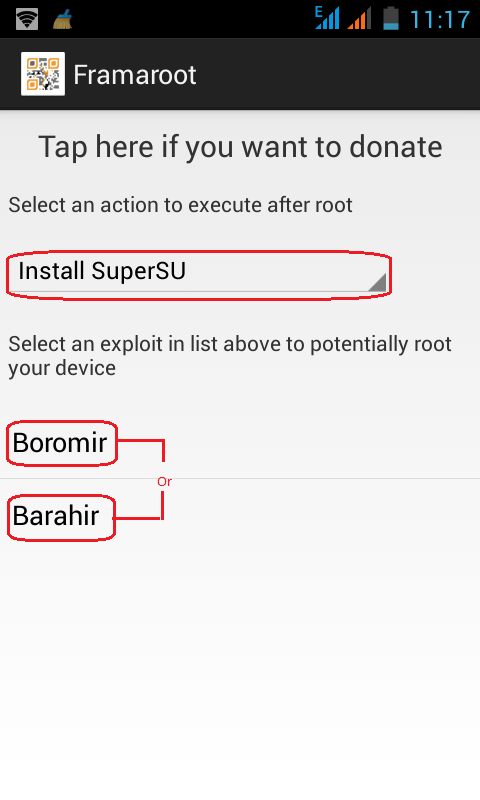
I am requesting to all of Walton Primo E2's non advanced users for not to follow this article. Remember that rooting your device is not a style. Only follow following procedures if you think rooting Walton Primo E2 is necessary for you. Or if you want to play HD games by enabling SWAP. Try How to Root Android Devices using Framaroot if you need detailed instructions with more screenshots.- Download, Install and Open Framaroot_1.9.1.apk.
- Select Install SuperSU as an action to execute after root. (If already selected then proceed to next steps).
- Tap Boromir. You'll see Success ... Superuser and su binary installed. You have to reboot your device.
- Reboot your Primo E2. After reboot you'll see Android is upgrading.
- That's all. Now you can find SuperSU app in your App drawer. Enjoy your rooted Walton Primo E2.
Install Custom CWM Recovery on Walton Primo E2 using Mobileuncle Tools
By Installing CWM recovery on your Primo E2 you'll be able to unlock
forgotten patern lock or any kind of security installed. Also you can
install custom ROMs, backup and restore stock ROM, partition SD card
etc. All you need to do is just following steps given below. Please try Flash Recovery Image On Rooted Android if you need detailed instructions with more screenshots.
- Download Walton Primo E2's custom CWM recovery.img.
- Put that recovery.img on the root of the SD card.
- Download, Install and Open Mobileuncle-Tools_20140111v2.9.9.apk.
- Now it will ask you for Superuser Access. Tap Grant to allow root permission.
- Now tap Recovery Update. Mobileuncle Tools will automatically find the recovery.img from root of the SD card.
- Tap recovery.img like screenshot given below.
- Mobileuncle Tools will ask Are sure flash recovery !. So tap OK to start the flashing process.
- That's All. Your Android device will automatically reboot to recovery mod.
If anything goes wrong with your Walton Primo E2. Just leave a comment
below. Maybe I can help you out. And there is a good news for Primo E2
users. That's is: It is possible to increase Walton Primo E2's RAM memory anytime after rooting your phone. Walton Primo E2's kernel supports SWAP.
As My trial Primo E2's RAM memory is currently 1.8GB (SWAP) + 512 MB (Physical). Also if you don't have a sd card with class 8 or 10 then you don't need to be worried about cause you can use Phone's internal sd card as Virtual RAM memory. So enjoy HD gaming without sudden force closing.
As My trial Primo E2's RAM memory is currently 1.8GB (SWAP) + 512 MB (Physical). Also if you don't have a sd card with class 8 or 10 then you don't need to be worried about cause you can use Phone's internal sd card as Virtual RAM memory. So enjoy HD gaming without sudden force closing.
Post a Comment